The Force Metadata JDBC Driver for SchemaSpy is a really cool tool available at Force.com Code Share that generates ER diagrams for your Salesforce org. Some people have emailed me asking for help installing and running the tool so here are some instructions that supplement what is listed on the project's wiki page.
- force-metadata-jdbc-driver-1.4.jar
- generated-sforce-partner-18.jar
- force.properties
- depends.zip
You'll also need to download the schemaSpy_4.1.1.jar file from the SchemaSpy files page and install Graphviz so it can generate the graphs. There is both a Mac and PC version.
The Partner web service is pointing to www.salesforce.com. If you want to generate your ER diagrams against a Sandbox org, you'll have to make some modifications as outlined on the wiki page.
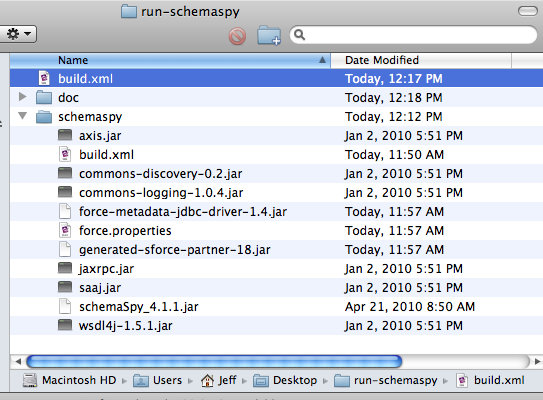
I created a folder on my desktop call "run-schemaspy" and dropped all of my files in there. Your folder should look similar to:

I also created a build file which I dropped in that same directory. Make sure you add your Salesforce username and password/token.
<project default="document">

 <property name="sf.username" value="SALESFORCE_USERNAME"/>
 <property name="sf.password" value="SALESFORCE_PASSWORD_AND_SECURITY_TOKEN"/>

 <target name="document">
 <echo message="Generating SchemaSpy documentation (requires Graphviz to be installed to produce diagrams)"/>
 <delete dir="doc" failonerror="false"/>
 <java classname="net.sourceforge.schemaspy.Main" fork="true" failonerror="true">
   <arg line="-t schemaspy/force"/>
   <arg line="-db Claims"/>
   <arg line="-un ${sf.username}"/>
   <arg line="-pw ${sf.password}"/>
   <arg line="-o doc"/>
   <arg line="-font Arial"/>
   <arg line="-fontsize 8"/>
   <arg line="-hq"/>
   <arg line="-norows"/>
   <arg line='-desc "Extracted from ClaimVantage Claims r${env.SVN_REVISION} on Force.com"'/>
   <arg line="-u fake"/>
   <arg line="-p fake"/>
   <arg line="-host fake"/>
   <classpath>
    <fileset dir="schemaspy" includes="*.jar"/>
   </classpath>
 </java>
 </target>

</project>
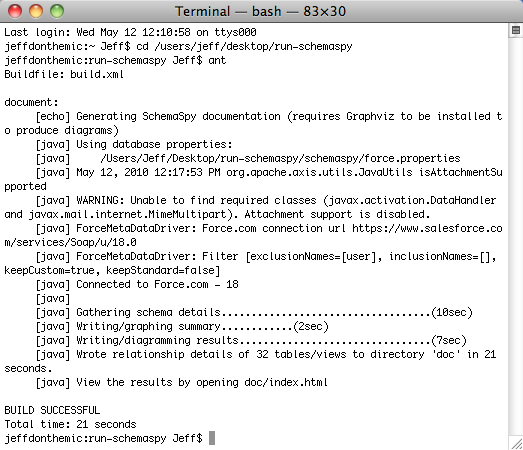
You should then be able to open up a terminal, navigate to the directory on your desktop and run ant using the build file (assuming ant is installed correctly). Your terminal should look like the screenshot below. The script will create a doc directory and generate the ER diagrams in this directory. Simply open index.html file in the doc directory and you are golden!


